TOC
“If you shoot RAW you get better photos” this is one of the mantras that the novice photographer hears himself repeated over and over. In themselves, RAWs are not better pictures, because… they are not pictures! They are a series of information from which a photo can be extracted, that final JPEG that we will display on the screen or print. This first point, apparently trivial, brings with it a not insignificant consequence. What are we looking at when we look at a RAW?
We watch RAW all the time, on the rear camera screen, like in the Photoshop preview. What we are looking at, however, are not real pictures, but the base from which we would go to extract our JPEGs. Nevertheless, we are in front of something. This something is only an approximation made by the camera or by the software. It is there to give us an approximation of the photo we took. The pic we have taken for now is nothing more than a series of raw data, the RAW.
We understand how the preview is there to give us a visual reference instead of a chain of binary code. So to understand what is hidden between those 0s and 1s, we just have to rely on the camera or the software. These, however, will give their understanding of what is underneath. The interpretation is never unambiguous: no matter how accurate, it will never objectively reflect the RAW. We will be able to see the result when it is finally converted to JPEG, but not before. We can settle for this or try to investigate in person a little more thoroughly.
But the reader, like the writer, may not be an IT wizard. No fear, because a fundamental program comes to our rescue: RawDigger. Approaching it and understanding its usefulness will be very useful, in particular for analyzing that atypical kind of RAW that is the X3F from Foveon sensors. Unfortunately, the program is not for free, but there is the possibility of doing a free trial, and that it is certainly not an expensive one.
Once we open a RAW we have the opportunity to understand several things. First, we can take a peek at the EXIF (1) to better understand how and when the photo was taken. There is also another mountain of information, useful if you intend to replicate the shot such as exposure and openings. However, without opening anything else, we immediately see confirmation of what was said before. In Display (2) we find “RGB render” as an option, but not the only one. Right from the start, the program allows us to separate the four channels of the RGB sensor, or rather RGGB since the green is repeated twice.
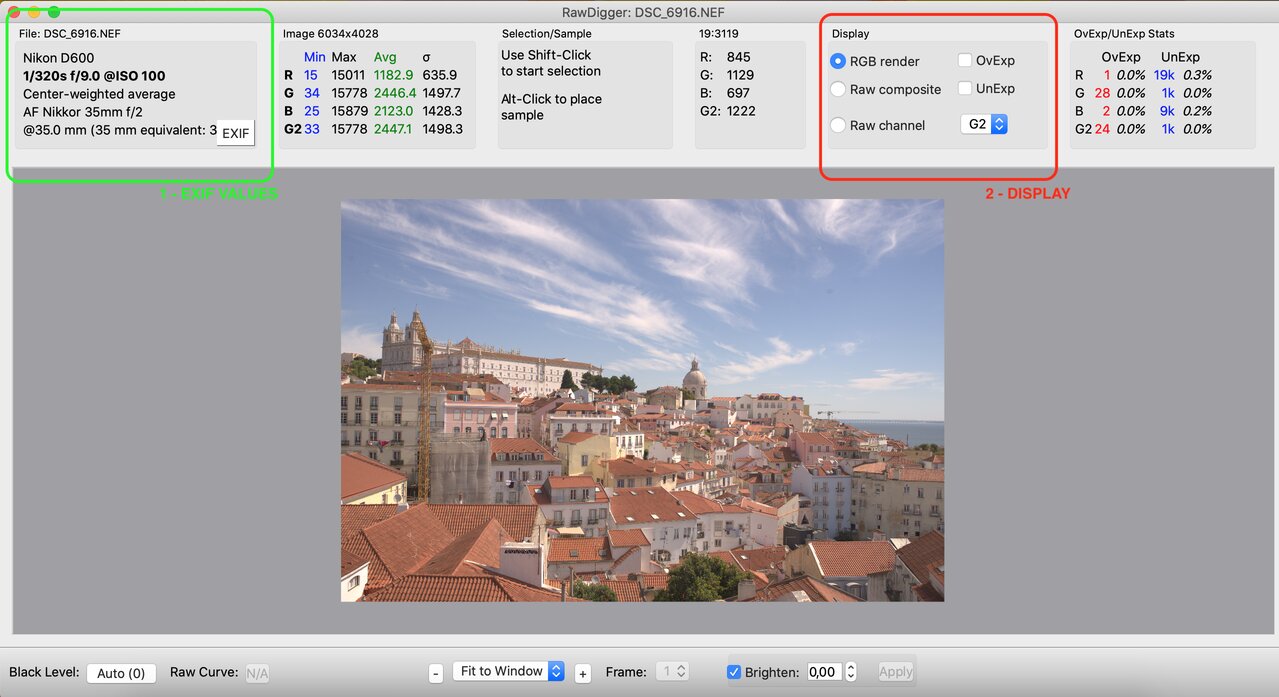
Right next to it we have the opportunity to check the over/under exposure option. This allows us to immediately see the areas of the photo that are not correctly exposed. This option is also possible by selecting individual channels. Right next to it, we can see if there are areas of the photo exposed incorrectly. Luckily for me, this scene was extremely easy to read, with the high sun illuminating Lisbon: in other words, it was hard to go wrong!
Finally, we find perhaps the most important indication: the histogram. It gives us information on the RAW exposure for each of the color channels. We will no longer need the approximate JPEG previews to understand how the photo was exposed and what kind of interventions it needs. It is therefore essential to be able to read the graph in front of us well.
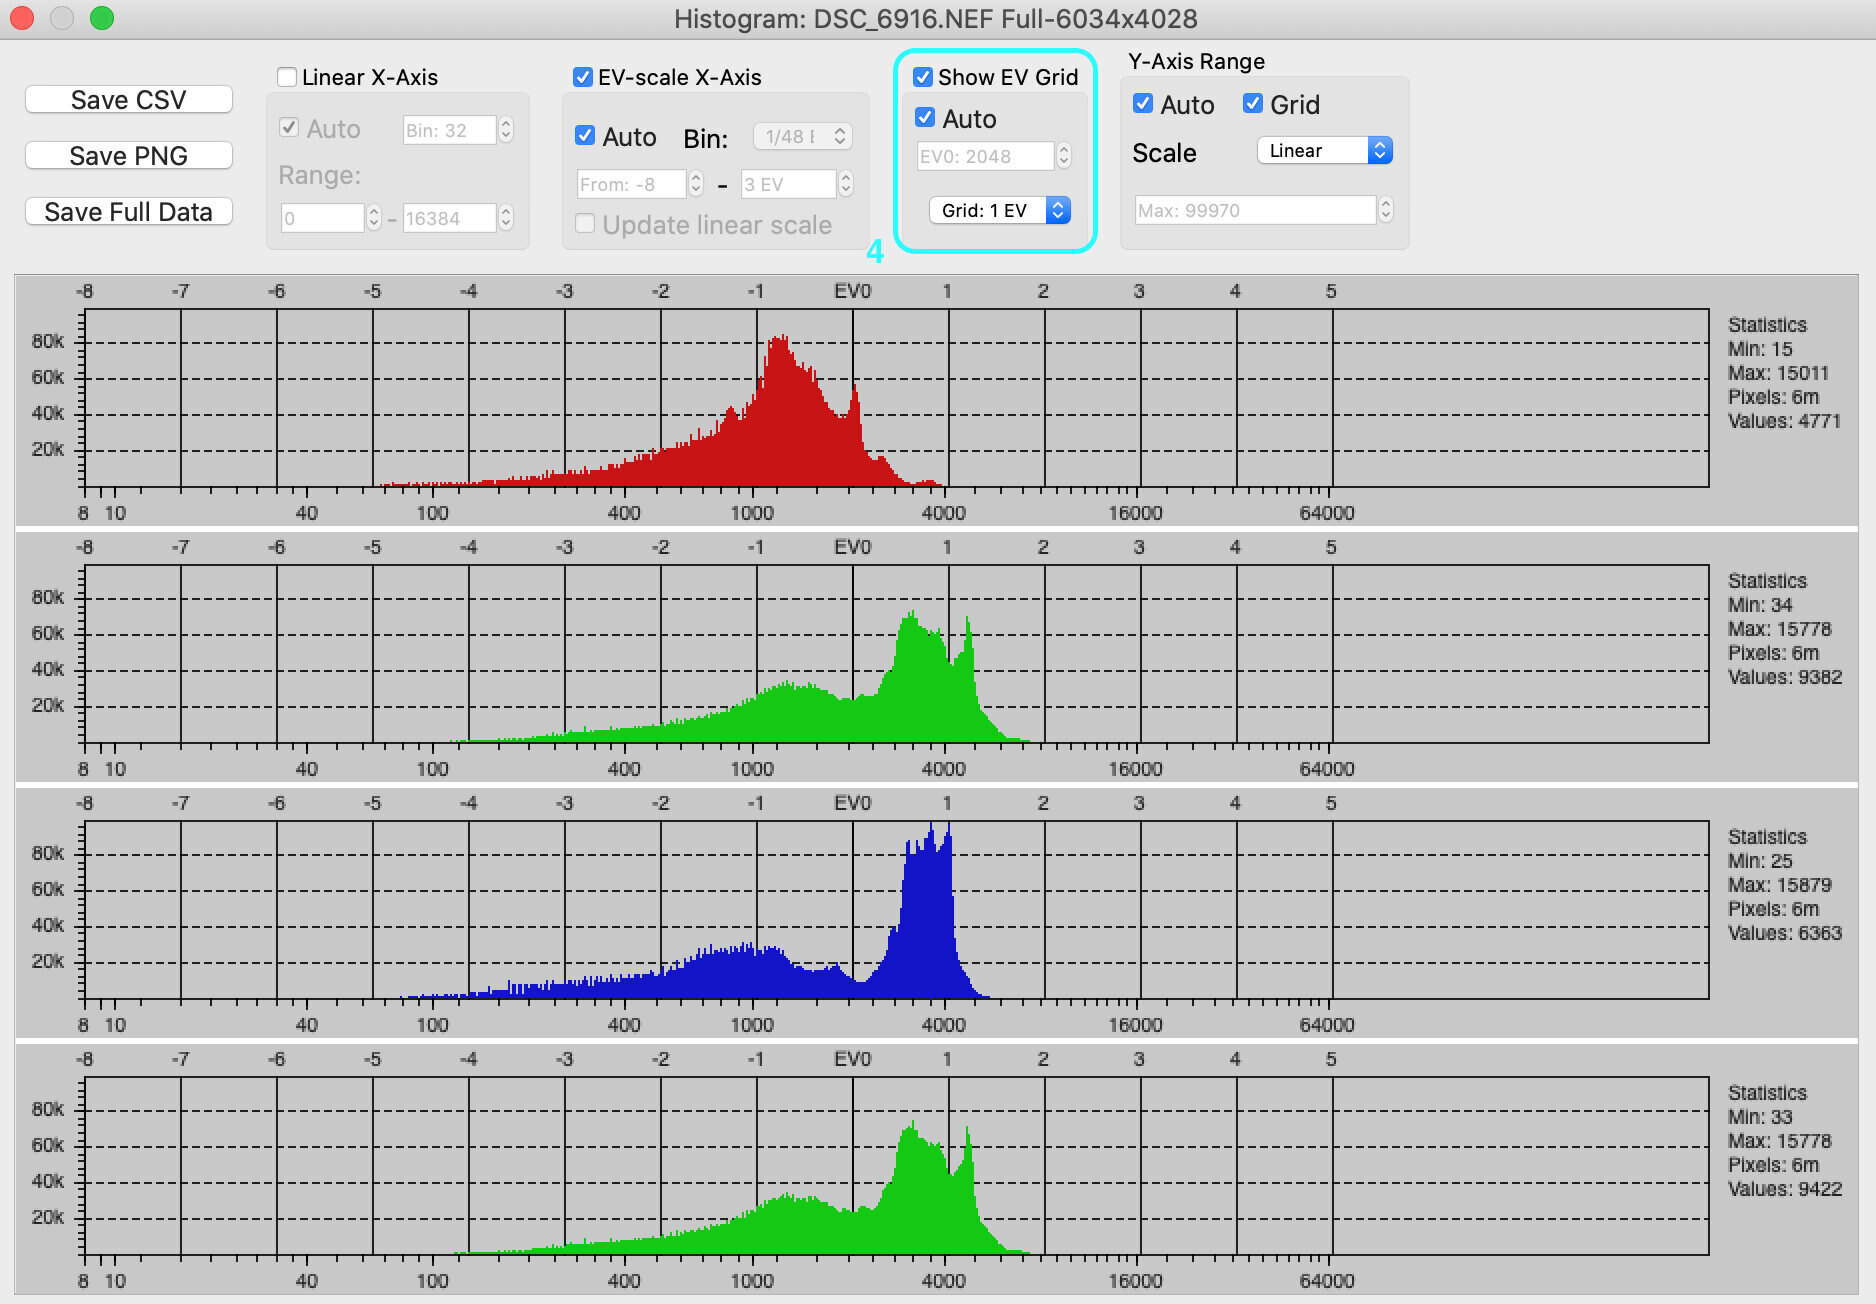
First of all, we have to make sure that the EV Grid is centered on auto (4). In this case, the program centers the histogram around a value that corresponds to 3 stops less than where the machine burns the highlights. Basically, it is telling us where the sensor is more performing, but we will see later how to “squeeze” it best. However, what we can immediately see is whether the exposure is correct. In this case, we see how the photo is a little bit underexposed, which cannot be observed in the final result due to the low contrast of the scene. We also immediately know the range of the scene, counting the EVs covered by the histogram. In doing this, however, you must be careful: while the highlights often end up in a wall, the tail of the shadows is longer. In our case, the last EV of the shadows is not real information, but noise, as we can see from the jagged histogram. By calculating this, we see how they are indeed 6 real stops of dynamic range and no more.
This whole introduction may seem trivial, but it is functional to what we will see later. Whether you are shooting with a Bayer or Foveon sensor, it is important to know if you are doing it right. In fact, we cannot just rely on software, especially in the most delicate situations. Besides, in the presence of particular sensors or where reviews are uncommon, RawDigger offers an excellent tool to make the most of the camera. This work must therefore not be understood as an ex-post control for an end in itself, but a basis for knowing the full potential of the technical means and exploiting them to the full! We will see this better in the next article.